Vanilla Bean Ice Cream
After literally years of debating whether or not I should buy an ice cream maker, I finally caved. I bought one from Williams-Sonoma because it came with an extra freezer bowl and a $20 rebate and it had great reviews. It's by Cuisinart and it's easy to operate and I figured out how to set it up without even looking at the directions because it's pretty self-explanatory. I'd never made ice cream before (not counting the time I made it in summer camp inside of a jar inside of a coffee can with ice and salt) so I wanted to start with the most basic and crucial flavor: vanilla.
 I know vanilla has this reputation for being plain because it's the most common ice cream, but when you eat something that's enhanced with vanilla bean and vanilla sugar and vanilla extract, it's other-worldly. Vanilla is delicious.
Ingredients [makes 2 to 3 pints]:
2 cups half & half
1 cup heavy cream
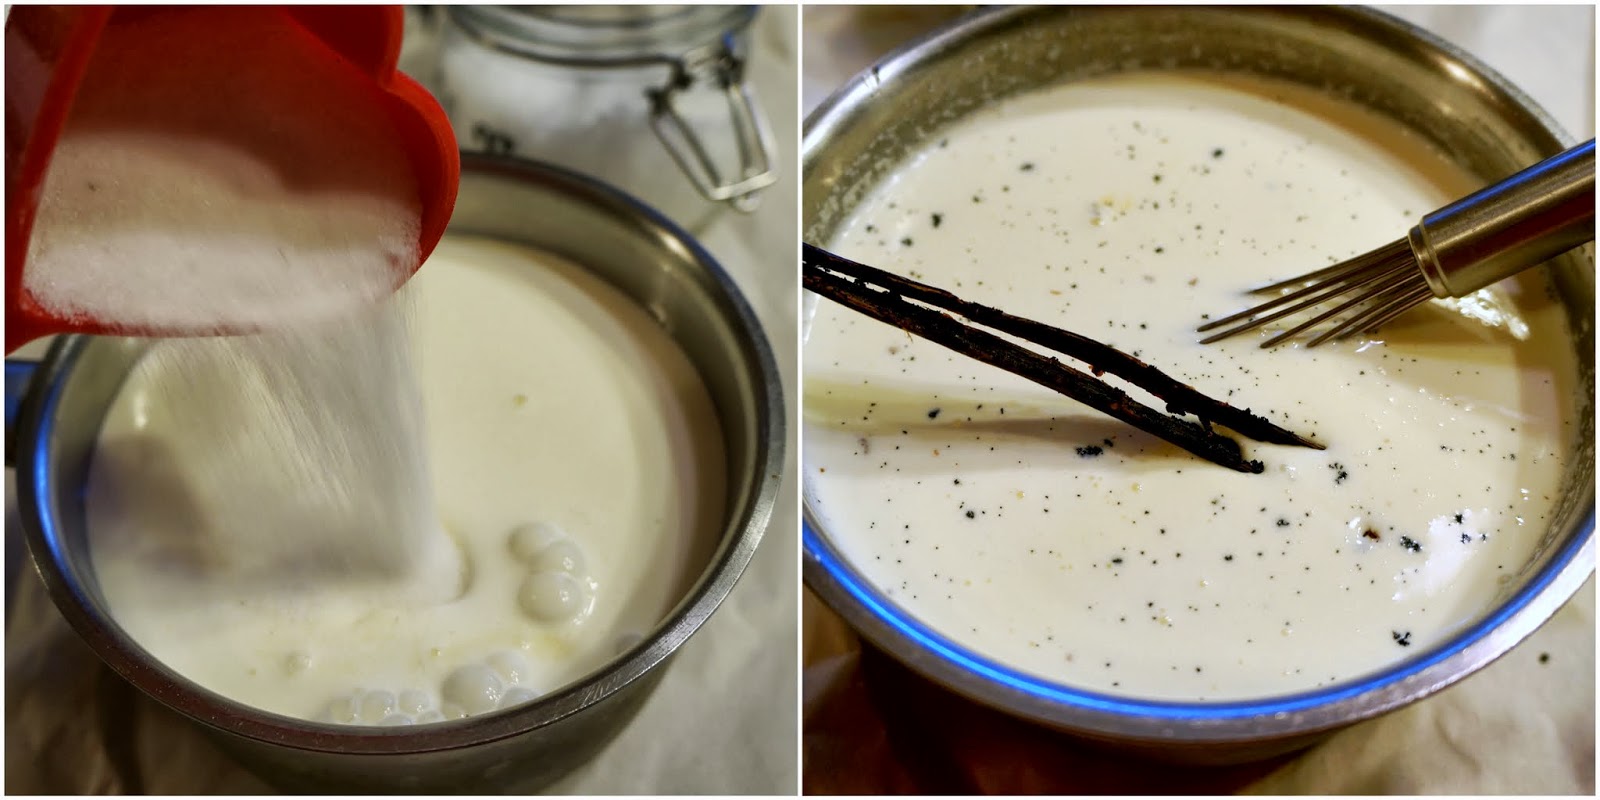
½ cup + ½ cup vanilla sugar
1 vanilla bean
4 egg yolks
½ teaspoon salt
1 teaspoon vanilla extract

Start by adding the half & half and heavy cream to a saucepan.

Split the vanilla bean in half and scrape out the "vanilla caviar."
 Add 1/2 cup of sugar and the vanilla bean and scraped vanilla caviar to the saucepan. Heat the cream mixture over low heat just until scalding. Watch carefully since dairy will boil over right when your back is turned. Set aside.

 Separate the eggs (and save the egg whites for macarons).
 Add the rest of the sugar to the egg yolks along with a bit of salt.
 Whisk furiously until the mixture is pale and thick.
 Take a little bit of the hot cream mixture and pour it into the egg yolks slowly while whisking. This is called tempering and it will prevent the yolks from scrambling. If the eggs do scramble a bit, you can certainly strain your custard but it will have a bit of eggy flavor, which is not desirable so just go slow. Keep adding the hot liquid, little by little, to the yolks until everything is combined.
 Pour the mixture back into the saucepan and place over a low heat.
 Stir continuously until thickened enough to coat the back of a spoon and then remove it from the heat.
 Strain the mixture to remove any little bits of vanilla bean fibers and allow to cool to room temperature. Then, cover the container and place in the refrigerator to chill for at least 4 hours. I left mine in overnight.
 Get your ice cream maker ready. Here's what mine looks like:
 Stir in some vanilla extract just before adding the mixture to your ice cream maker. Be careful not to use too much, even if you love vanilla extract, because the alcohol will prevent the ice cream from freezing.
 Make the ice cream according to your ice cream maker's directions. I had to place the bowl in the freezer for 48 hours. When it was unfrozen, I could hear liquid sloshing inside the structure of the bowl. Once it was frozen, no more sloshing. I set the bowl on the base, set the paddle and the lid, turned it on, watched it start to turn, and poured the ice cream base into the machine.
 Here are four shots of the progression, each one taken about 5 minutes apart. The longer you let your ice cream machine run, more air will be incorporated and create a lighter ice cream. Did you know that more expensive ice creams that come in smaller containers are usually denser and the cheaper ice creams that come in those big tubs have a lot more air whipped in? So in terms of bang for your buck, the two are probably on par with each other. Anyway, that's why the yield might be a little different every time, even if you use the same amount of ice cream base - it'll depend on how long you run the machine and how much air gets incorporated.
 When it's lovely and thick, you can eat it immediately for a soft-serve texture or pack it up and put it in the freezer for a firmer texture. You can see here that the ice cream looks a little gritty, as if the ice crystals that formed were too large. This worried me. I thought the texture of my ice cream wouldn't be smooth. However, I sneaked a taste and the ice cream was delicate and velvety and it got even better after it sat in the freezer.


 For the sprinkle version, I added a little bit of ice cream, shook in some sprinkles, added more ice cream, shook in more sprinkles, etc.

 After a few hours in the freezer, the ice cream was ready to eat.
 This ice cream is really rich, so decadent, and super vanillary.
 Here's the recipe page:


Ingredients [makes 2 to 3 pints]:
2 cups half & half
1 cup heavy cream
½ cup + ½ cup vanilla sugar
1 vanilla bean
4 egg yolks
½ teaspoon salt
1 teaspoon vanilla extract

Start by adding the half & half and heavy cream to a saucepan.

Split the vanilla bean in half and scrape out the "vanilla caviar."


I stored my ice cream in disposable styrofoam containers. I made little labels because I wanted to do a plain version and I wanted to add some sprinkles to the other.


Comments
Post a Comment
I'd love to hear what you have to say!