Diced Radish Kimchi | Kkakdugi (깍두기)
I haven't shared any Korean recipes in over a month. And it's not like my blog is meant to be a Korean food blog, but considering that I eat Korean food for at least 50% of my meals, it would seem like I'd share a lot more of it here, right? I'm thinking I should do some more Korean barbecue related posts, seeing as it's summer and we're in the thick of grill season.
In the meantime, I hope this kimchi recipe will suffice. Kkakdugi is one of my favorite types of kimchi. I think it's the texture that does it for me because it's satisfyingly crunchy. Because of this, I think it's best enjoyed with soups because of the texture contrast but it's also an awesome side dish for jjajangmyun and it's super delicious with a simple bowl of rice.
The best thing about making kkakdugi is that it's crazy easy. There's no rinsing, no rice flour, no special techniques or equipment involved in the process. The salt sprinkled on in the beginning isn't soaked forever and then rinsed off (the way it is even with quick cabbage kimchi) because it's big cubes of radish and the salt is necessary for seasoning through the center (like pickles). There's no rice paste or thickening agent because the seasoning sticks to the radish easily (unlike with cabbage kimchi where it tends to "slide" off). And since it's just cubes, you just need a knife and cutting board (unlike julienned radish kimchi which requires a mandolin).
 Ingredients:
4 lbs. Korean daikon radish (usually one large radish is about 4 lbs.)
3 tablespoons coarse salt (sea salt is what I prefer)
3 tablespoons sugar (white or brown)
½ cup hot pepper flakes (gochugaru; add more or less depending on your spice preference)
2 tablespoons grated ginger
2 tablespoons minced garlic
8 scallions, chopped
2 tablespoons fish sauce

Start by peeling the radish and then cutting it into ½" cubes. You can cut them a bit bigger if you like, but I like small-ish cubes because they're perfectly bite-sized. Any bigger and I usually have to bite the piece in half as I'm eating and I really hate that.
 Toss all of the cubed radish into a bowl and sprinkle in the salt and sugar and then give it a massage to coat.


 Leave the salted and sugared radish to sit for about 30 minutes or until there's a good amount of liquid in the bottom of the bowl. Drain the excess liquid.

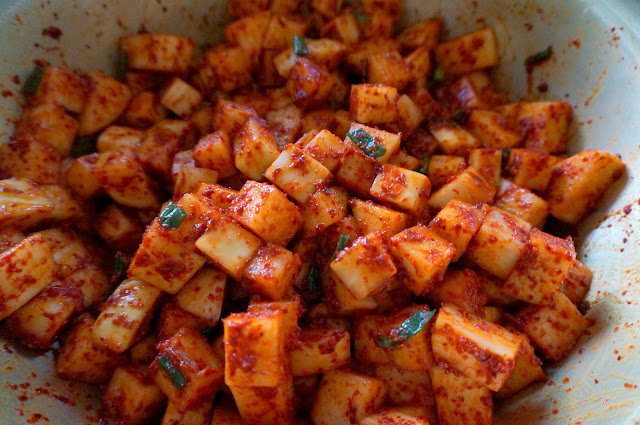
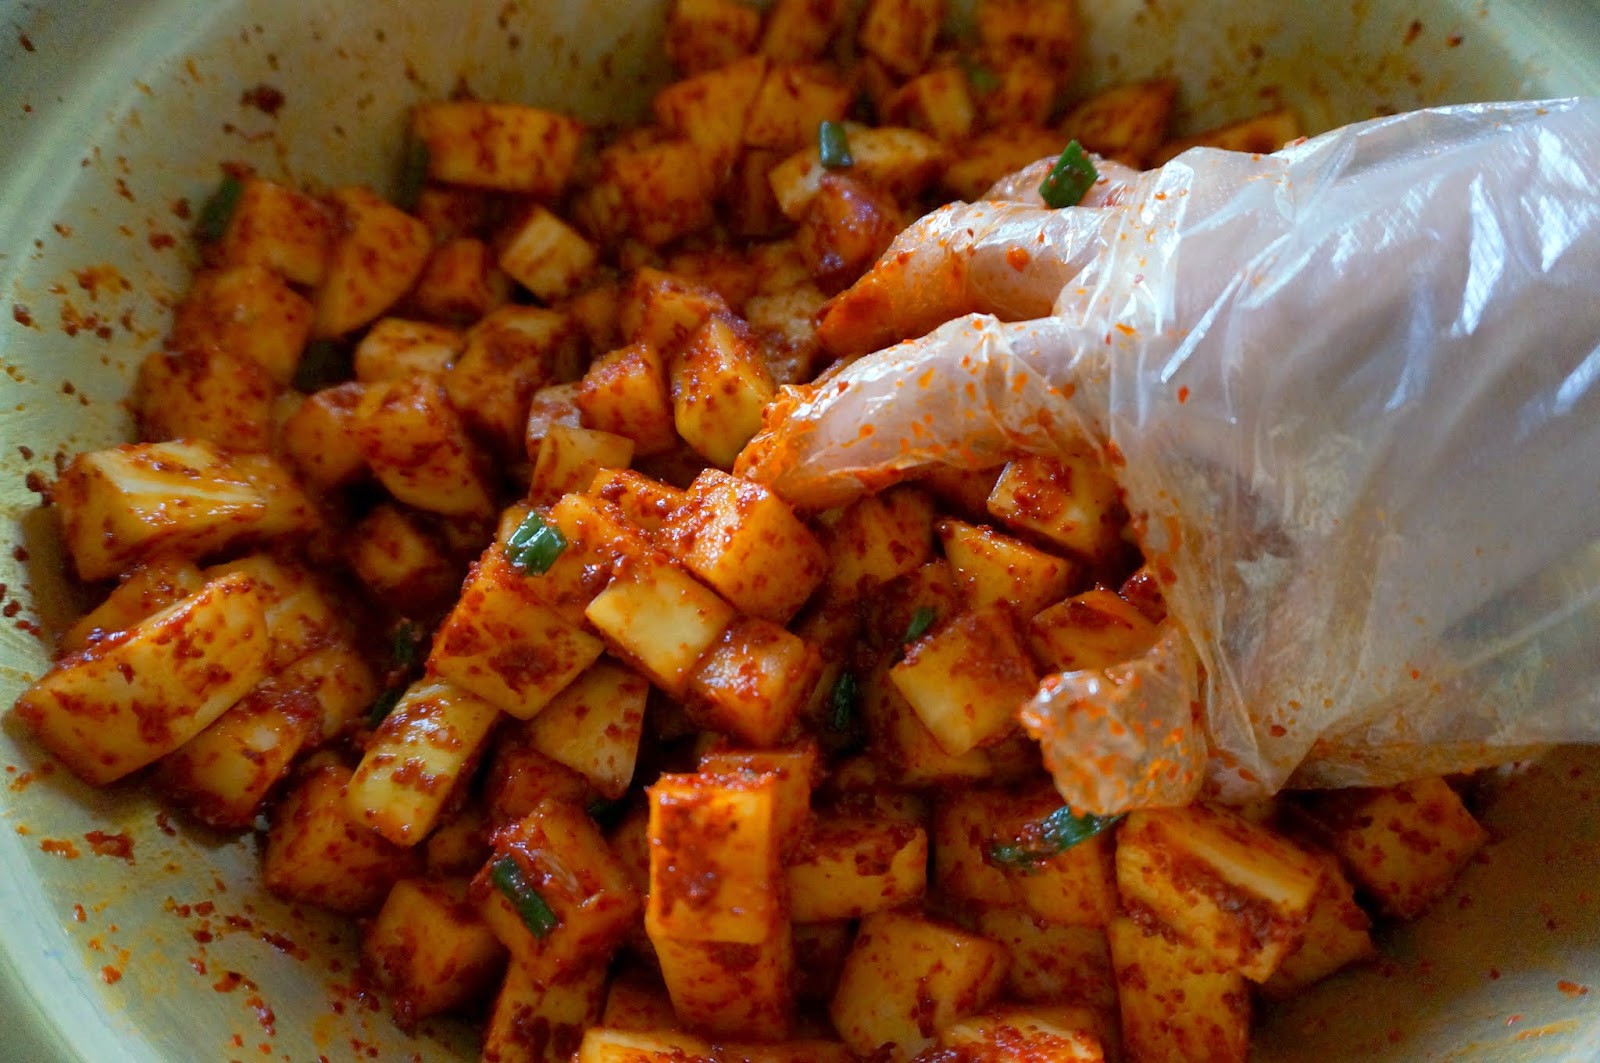
 Add all of the seasonings - hot pepper flakes, garlic, ginger, scallions, and fish sauce - and then use a (gloved) hand to massage it all together. The point here is to distribute the seasonings evenly and to really work them into the radish so that they develop a pickled flavor all the way through, instead of being bland in the center.


 At first, the seasonings will just sit on the surface of the radish but as you massage, the red color will penetrate the radish and you'll find that the radish starts releasing more liquid and a sauce will form.

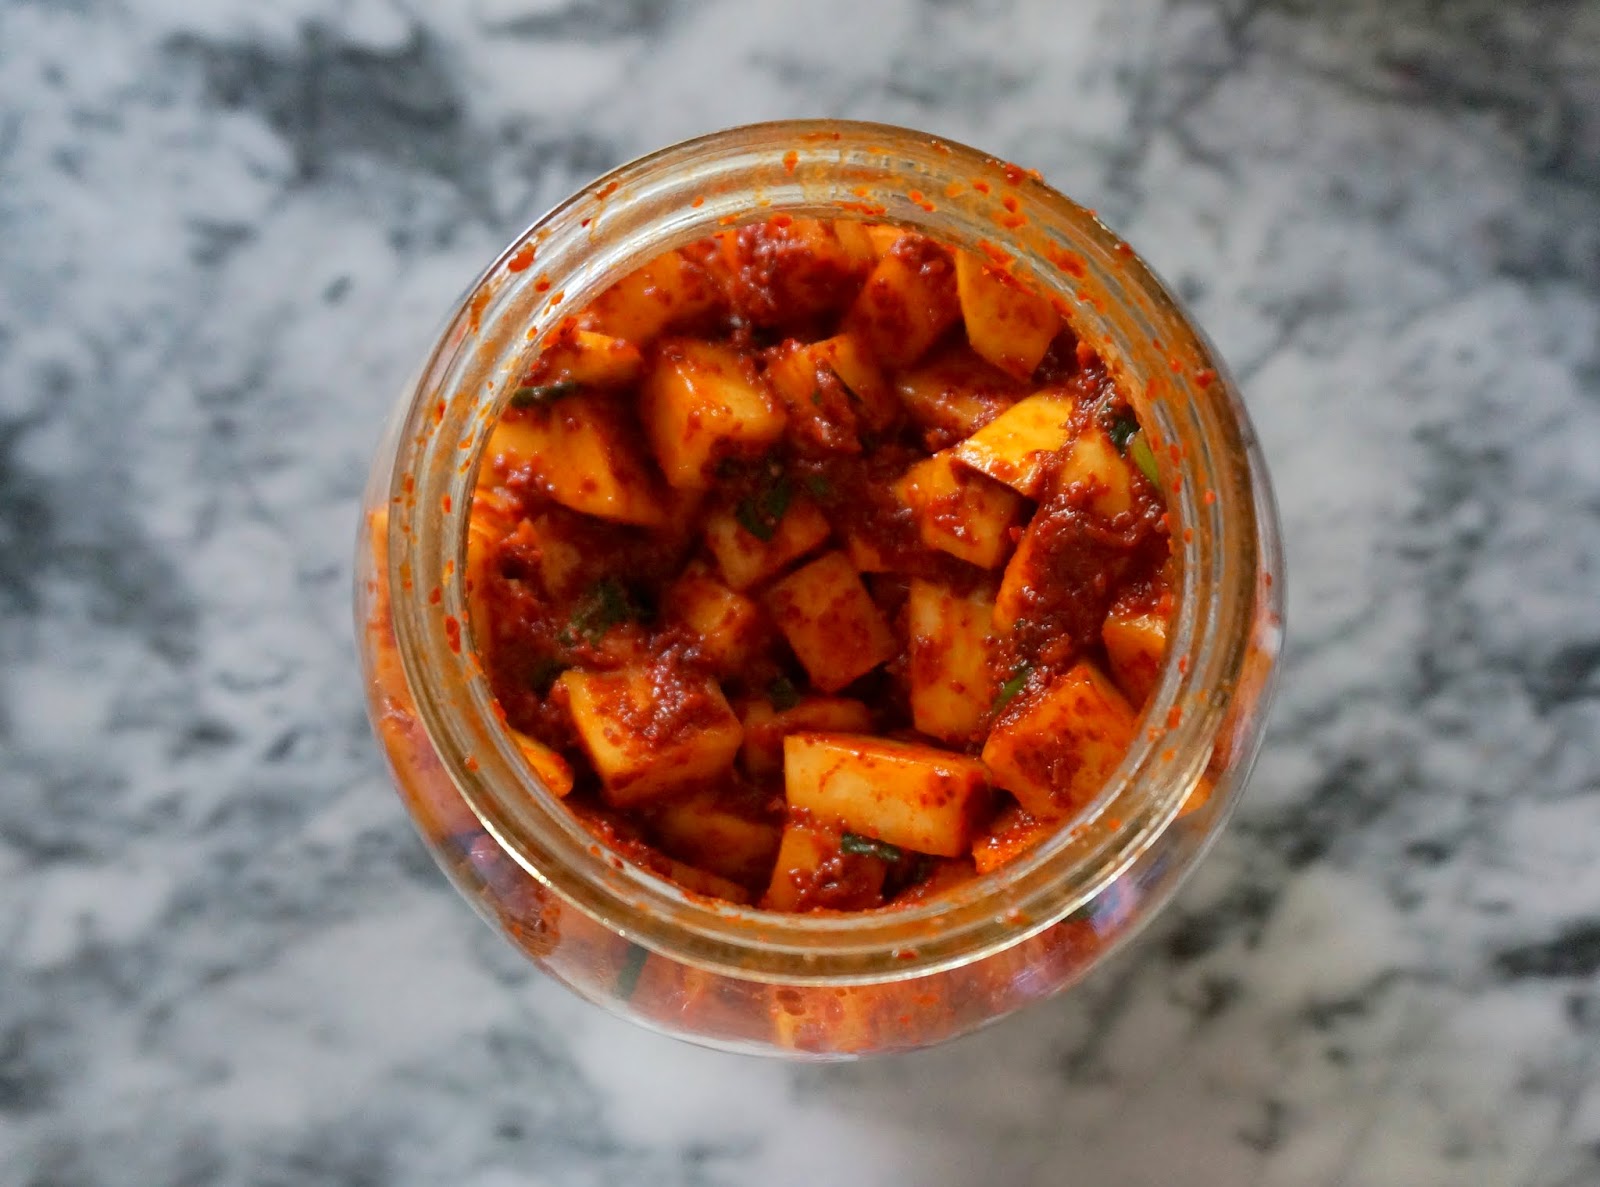
 Pack the kkakdugi into an airtight container. We use glass jars in our house; they're handy to have around, not just for kimchi making but also for cucumber pickles and it makes a great vessel for sangria.

 Really press the kimchi down into the jar, working out as much air as possible.
 Screw on the lid (I like to top with a piece of cling film before lidding just to prevent the white lid from staining) and then leave the kimchi to sit at room temperature for about 24 hours before popping it into the fridge. If it's a boiling hot day, maybe shorten that to 12 hours. And if it's a freezing cold day, lengthen to 36 hours.
Leaving the kimchi at room temperature jump starts the fermentation process. If you'd like to prolong the shelf-life of the kimchi or you're keen on the flavor of "unripened" kimchi, then you can pop the jar into the fridge right away.
 After a few days, you'll find that the kimchi has settled and there's a lot more juice in the jar. This is a good thing. Mum used to take a ladle and press the kkakdugi down every few days, just to make sure it was all submerged so that it would pickle evenly. If you find that there are a lot of exposed radish cubes up top, you can do the same.
 When the kimchi has been pickled to your liking, it's time to eat. Scoop a portion out into a serving bowl and have at it.


 We inaugurated this batch of kkakdugi with a meal of Korean-fried chicken and honey soy glazed green beans.
 The kimchi is bright and punchy and crunchy. If you've had cabbage kimchi before, the taste is basically the same; the texture is where it's different. If you've never had any type of kimchi before, it's just a Korean-style spicy pickle. The fermented smell and flavor are somewhat of an acquired taste, but if you're into different kinds of food and you have an open mind, I highly recommend you give it a go.


 Here's the recipe page:

In the meantime, I hope this kimchi recipe will suffice. Kkakdugi is one of my favorite types of kimchi. I think it's the texture that does it for me because it's satisfyingly crunchy. Because of this, I think it's best enjoyed with soups because of the texture contrast but it's also an awesome side dish for jjajangmyun and it's super delicious with a simple bowl of rice.
The best thing about making kkakdugi is that it's crazy easy. There's no rinsing, no rice flour, no special techniques or equipment involved in the process. The salt sprinkled on in the beginning isn't soaked forever and then rinsed off (the way it is even with quick cabbage kimchi) because it's big cubes of radish and the salt is necessary for seasoning through the center (like pickles). There's no rice paste or thickening agent because the seasoning sticks to the radish easily (unlike with cabbage kimchi where it tends to "slide" off). And since it's just cubes, you just need a knife and cutting board (unlike julienned radish kimchi which requires a mandolin).

4 lbs. Korean daikon radish (usually one large radish is about 4 lbs.)
3 tablespoons coarse salt (sea salt is what I prefer)
3 tablespoons sugar (white or brown)
½ cup hot pepper flakes (gochugaru; add more or less depending on your spice preference)
2 tablespoons grated ginger
2 tablespoons minced garlic
8 scallions, chopped
2 tablespoons fish sauce

Start by peeling the radish and then cutting it into ½" cubes. You can cut them a bit bigger if you like, but I like small-ish cubes because they're perfectly bite-sized. Any bigger and I usually have to bite the piece in half as I'm eating and I really hate that.


Leaving the kimchi at room temperature jump starts the fermentation process. If you'd like to prolong the shelf-life of the kimchi or you're keen on the flavor of "unripened" kimchi, then you can pop the jar into the fridge right away.


Comments
Post a Comment
I'd love to hear what you have to say!