New Kitchen Part 4: The Demo & The Prep
Demolition is probably the most stressful part of the kitchen renovation process. At least, it was for me. It's messy, it's labor-intensive (if you're doing it yourself), and it marks the start of no longer having a kitchen to use until the renovation is complete. Woe is me!
 Eww, look at how gross our kitchen is. This renovation is so long overdue.
 Luckily, our dad is a decent handyman and my sister and I are not opposed to getting our hands dirty so we were able to do everything ourselves. Major kudos to whomever built our cabinets in the first place because they were decently built, really secure, and a pain in the butt to remove. If you are also renovating and plan on removing the kitchen yourself to save a few bucks, I recommend you arm yourself with a shop-vac and dust mask. We have our own shop-vac with a crazy strong suction that made clean up so much easier.
Emptying the cabinets was quite a chore, as we had a lot of fragile items. I took some time to wrap up the fragile stuff that I had the strongest attachment to using tissue paper from Ikea (we jacked a huge stack the last time we were there). We stored most of our stuff in our basement - which now looks like it should be featured on an episode of 'Hoarders' - and my special items in the living room where they'd be a bit safer.
 We started by removing the doors from the cabinets and then the upper cabinets were the first to go. Next, the dishwasher got unhooked, the cooktop and oven were pulled out, and the countertop was pulled off. The hardest part was pulling out the lower cabinets for a few reasons. One, the gas lines and plumbing were woven in and out and two, they were secured really well to both the floor and wall. If you're wondering what happened to all of this stuff, we didn't actually rent a dumpster because my dad rents one for his business so we got rid of the bulk of our garbage there. My dad also knows a guy who collects and uses and sells scrap metal so we invited him over to take what he wanted. He was really happy and grateful (he started clapping with joy when he saw the pile of rubbish - or the pile that was one man's rubbish and another man's treasure, I suppose). It was strangely satisfying to know that our garbage could be used for something. You're welcome, Mother Earth. You can utilize organizations like Habitat for Humanity, Green Demolitions, or similar, to minimize disposal as well.
Here's a series of photos which shows the progression of the demoltion. These shots were taken over the course of 4 days [08/15/2013 to 08/18/2013]:
 The last part of the demolition was to remove the soffit. Our new design has 39" wall cabinets so we need a full ceiling height. The second wall (with our oven) doesn't have any wall cabinets but the cabinets surrounding the refrigerator run past the length of the original soffit so it had to go.
 Chipping away the drywall created a lot of dust so we wore these masks (which are actually medical masks but hey, they got the job done). Want to hear something gross? We had a mouse problem (that's what we get for living in a wooded animal-rich area) so when we pulled up the cabinets, there were little mouse poops everywhere underneath the cabinet bases. And then later, while we were cleaning, I found a dead mouse. It made want to cry and die and rip my own insides out. Thankfully, we'll be patching up any secret tunnels that those little buggers have been using to ruin our lives and be rid of them for good (fingers crossed).

 Enter: shop-vac. I mean, will you look at the before and after? Thanks, shop-vac. You're amazing! We did have to pick up the bigger pieces by hand, of course. And as I was vacuuming, if I saw a nail or screw in the rubble, I tried to pick it out just to prevent any mechanical damage to my friend.
 Even though it's tough not having a kitchen, we have our grill and before the sink, stove, and oven went down, we prepped a bunch of food (which I'll be sharing in a post soon). Also, it's great that we live in an area with lots of different food (Thai, Italian, Vietnamese, burgers, Mediterranean, bagels, delis, Chinese takeout, sushi, steakhouses); so it's hard to complain.
After the demo came the prep work: paint, patching the gaping soffit holes with drywall, relocating the electric lines to where we'd need them, adding a backer board for the tile, and painting. All of this demolition work took a week and I took a couple days off of work to finish up the painting [08/19/2013 to 08/27/2013].
We had to spackle the grooves and holes and once it was dry, we sanded it smooth. It made a ton of dust so I wore a bandana to protect my hair, safety glasses to protect my eyes, and a dust mask to protect my nose and mouth.


 For our paint colors, we went to Home Depot and chose paint from Behr. There isn't a specific reason we chose Behr; it's just a coincidence that I think bears are really cute and I have Big Red Bear pride. In all honesty, they just had the broadest color selection compared to the other available paint brands at our Home Depot. I'm not a fan of those kitchens that feature a "pop of color" on the walls - usually it's something like celery green or a pale yellow - and I didn't want an all-white kitchen with white subway tiles, which seems to be the trendiest type of kitchen right now. So, we decided on a lovely warm brown which would look good carried through other parts of the house (because we have some paneling on the stair area that leads up to the living room which needed to be painted too).
 We taped off everything that needed taping, washed the walls with TSP cleaner (tri-sodium phosphate) so the paint would stick, primed with two coats of Behr indoor primer, and then painted. Honestly, the electrical sockets and light switch plates probably didn't need to be taped because we're replacing them, but it's always a lot of fun to peel the tape and see the lovely clean lines.


 I love how much bigger and brighter and more open our kitchen looks now that it's painted. Less drab and dreary compared to the hideous wood paneling. The paint reads a little more mustard yellow in these photos than it does in real life. It's actually a bit more pink and peachy and reads closer to the paint chip I shared up above. Painting was tiring and we were a bit distracted by all of the little imperfections but they're hardly noticeable unless you're really looking for them. I painted the entire ceiling myself and it was one of the best arm workouts of my life.
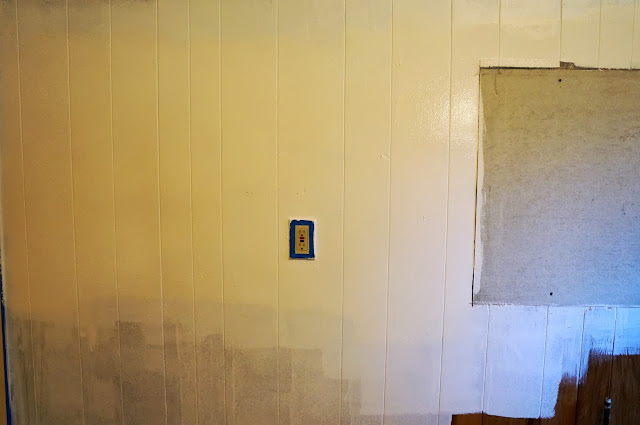
 If you're wondering why we didn't do a great job painting some of the walls - like the one below - the cabinets will be covering up most of these walls and we didn't want to waste paint (re: we were lazy).
 We installed just enough (unfinished) hardwood flooring to provide an even base for our cabinets. We tried to save money where we could.

I also painted the trim around the windows, which made a huge difference, and we installed our new lighting fixtures (we kept the 5-light chandelier pictured above but got rid of the other one), but I'm sort of holding off on sharing too much right now because I feel like I need to save a few things to make the final reveal more dramatic.
Next, I'll be sharing our cabinet assembly experience.


Emptying the cabinets was quite a chore, as we had a lot of fragile items. I took some time to wrap up the fragile stuff that I had the strongest attachment to using tissue paper from Ikea (we jacked a huge stack the last time we were there). We stored most of our stuff in our basement - which now looks like it should be featured on an episode of 'Hoarders' - and my special items in the living room where they'd be a bit safer.

Here's a series of photos which shows the progression of the demoltion. These shots were taken over the course of 4 days [08/15/2013 to 08/18/2013]:


Our kitchen was a pretty big mess by the time all of the chipping and hacking and busting was done. Though, we did manage to keep the mess to just half of the room.


After the demo came the prep work: paint, patching the gaping soffit holes with drywall, relocating the electric lines to where we'd need them, adding a backer board for the tile, and painting. All of this demolition work took a week and I took a couple days off of work to finish up the painting [08/19/2013 to 08/27/2013].
We had to spackle the grooves and holes and once it was dry, we sanded it smooth. It made a ton of dust so I wore a bandana to protect my hair, safety glasses to protect my eyes, and a dust mask to protect my nose and mouth.


I also painted the trim around the windows, which made a huge difference, and we installed our new lighting fixtures (we kept the 5-light chandelier pictured above but got rid of the other one), but I'm sort of holding off on sharing too much right now because I feel like I need to save a few things to make the final reveal more dramatic.
Next, I'll be sharing our cabinet assembly experience.
DIY kitchen cabinets have become the most economical option for homeowners looking to improve their homes with a strict budget.
ReplyDeleteUnleash your creativity with Do It Yourself Kitchen Cabinets! I'd like you to please discover how to build, paint, and personalize cabinets that suit your style.
ReplyDeleteYou can twist it in any way that you can apply to transform the outlook of your kitchen with cream kitchen cabinets.
ReplyDeletePerfect for DIYers and professionals alike, RTA white oak cabinets bring warmth, durability, and a touch of sophistication to any kitchen or bathroom.
ReplyDeleteIf your pink kitchen cabinets have a matte or glossy finish, use a protective sealant to prevent stains and smudges.
ReplyDeleteMid century modern kitchen cabinets go very well with the open kitchen plan because they also concentrate on de-cluttering the look of the kitchen while being space-saving and useful.
ReplyDeleteOur expert internet marketing 1on1 service helps businesses thrive online. We optimize websites, boost search rankings, and craft engaging content to drive traffic.
ReplyDeleteAs one of the best Omegle alternatives, it offers fun, safe anonymous video chats to chat with random people effortlessly.
ReplyDeleteLove seeing the kitchen transformation from the ground up—demo and prep are such important (and often overlooked) parts of the process! During renovations like this, it's definitely smart to have plumbing checked early on. Many homeowners count on reliable Plumbers in Alpharetta to make sure everything behind the walls is updated and leak-free before the new build begins. Can’t wait to see the final result!
ReplyDeletePeople looking for interactive sports platforms often explore options such as 8xbet for better usability.
ReplyDeleteIn recent trends, sage green kitchen cabinets have become a top choice for creating calming kitchen spaces.
ReplyDeleteA detailed renovation walkthrough that captures the reality of kitchen demolition and prep work, from cabinet removal and appliance disconnection to drywall patching, dust control, and repainting, while also highlighting how much planning and effort goes into transforming a space before new installations begin. The practical challenges like dealing with plumbing lines, electrical adjustments, cleanup, and temporary loss of kitchen functionality really show how complex even the “behind the scenes” stage can be in home improvement projects. For situations involving pipe adjustments, leaks, or kitchen plumbing rework during such renovations, it’s always wise to consult experienced professionals like Plumbers in Alpharetta to ensure everything is safely handled and properly reconnected.
ReplyDelete