Pork Soup Dumplings (Xiao Long Bao)
I'm aggressively excited to share this post because it's a fun one. I finally got the motivation to make some soup dumplings. I even bought a new bamboo steamer for the occasion; yes, that is how enthusiastic I was about this whole thing.
If you've never enjoyed xiao long bao, please, get yourself to a dim sum place as soon as possible and partake. They're just little Hershey kiss-shaped dumplings with a soupy filling. There's literally soup inside the dumpling and it's amazing. Whenever my friends and I go out for soup dumplings, we'd make an effort not to spill the soup. Whoever spills the soup is deemed the loser. You too can play this game; it's not copyrighted.
This is definitely a more time-consuming recipe and it's not something I really plan on doing again. I mean, maybe I would for a super special occasion, but it's a long process and honestly, I would rather pay someone else to make them, cook them, and serve them to me. However, I am glad I tried and they did turn out really delicious so if you're into labor intensive cooking projects, then you should make them all the time!
 Ingredients:
aspic
1 lb. pork tail
2 pork neck bones
¼ lb. Chinese ham
4 scallions, chopped
2 cloves garlic, crushed
2" piece ginger, chopped
1 teaspoon white peppercorns
4 cups water
filling
½ lb. ground pork
1 teaspoon grated ginger
2 cloves garlic, minced
2 teaspoons soy sauce
1 teaspoon honey
¼ teaspoon sesame oil
2 tablespoons Chinese rice wine
dough
2¼ cups flour
1 cup hot water
1 tablespoon vegetable oil
sauce
3 tablespoons black vinegar
1 tablespoon soy sauce
¼ teaspoon minced ginger
1 scallion, sliced
tools
bamboo steamer
parchment paper or cabbage leaves
 To make the soup, you need some cuts of pork that will yield a gelatinous soup and a few aromatics. Add the pork tail, neck bones, and ham to a pot along with scallions, smashed garlic, ginger, and white peppercorns. There's nothing inherently special about the white peppercorns; they're just a milder kind of pepper so if you don't have this ingredient, just substitute with ½ teaspoon black peppercorns.

 Top off the pot with water (about 4 cups) and set over high heat and bring to a boil. I like using a slightly smaller pan because it ensures that the ingredients are all submerged, even with the small amount of water. If you only have larger pots, I would recommend making sure to add enough water to cover and you'll just have to reduce the stock more.
Once the stock comes to a boil, skim off any scum that comes to the surface and then reduce the heat to low. Simmer the stock for about 2 hours, or until the broth has reduced by more than half and the meat is tender. The meat should be tender, not because it's going to be eaten, but because the tenderness is an indication that the collagen in the meat has broken down and released itself into the stock.


 Strain the stock and discard the meat and aromatics. Cool the stock completely, cover, and chill for 8 hours or until completely solid.
 The best test for checking if the aspic is ready is to turn the container upside down.
 To make the filling, add ground pork, soy sauce, Chinese rice wine (you can substitute a dry Sherry or dry white wine if you can't find shaoxing wine), sesame oil, honey, grated ginger, and minced garlic to a bowl.

 Skim any fat off of the top of the aspic. Shake it out of the container and cut it in half. Cube up one half into larger ½" pieces and set aside; return these pieces to the fridge to keep them solid. Chop up the other half into slightly smaller pieces.


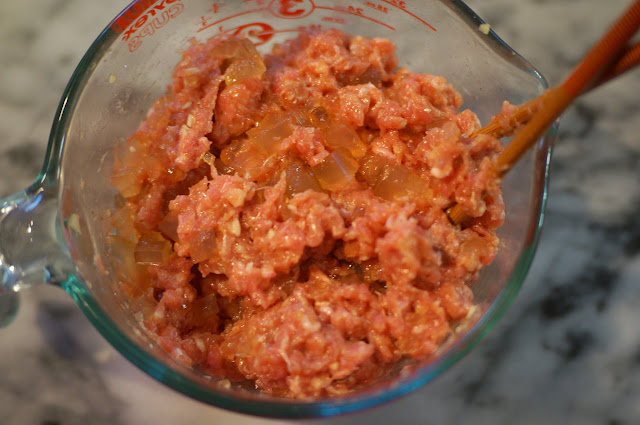
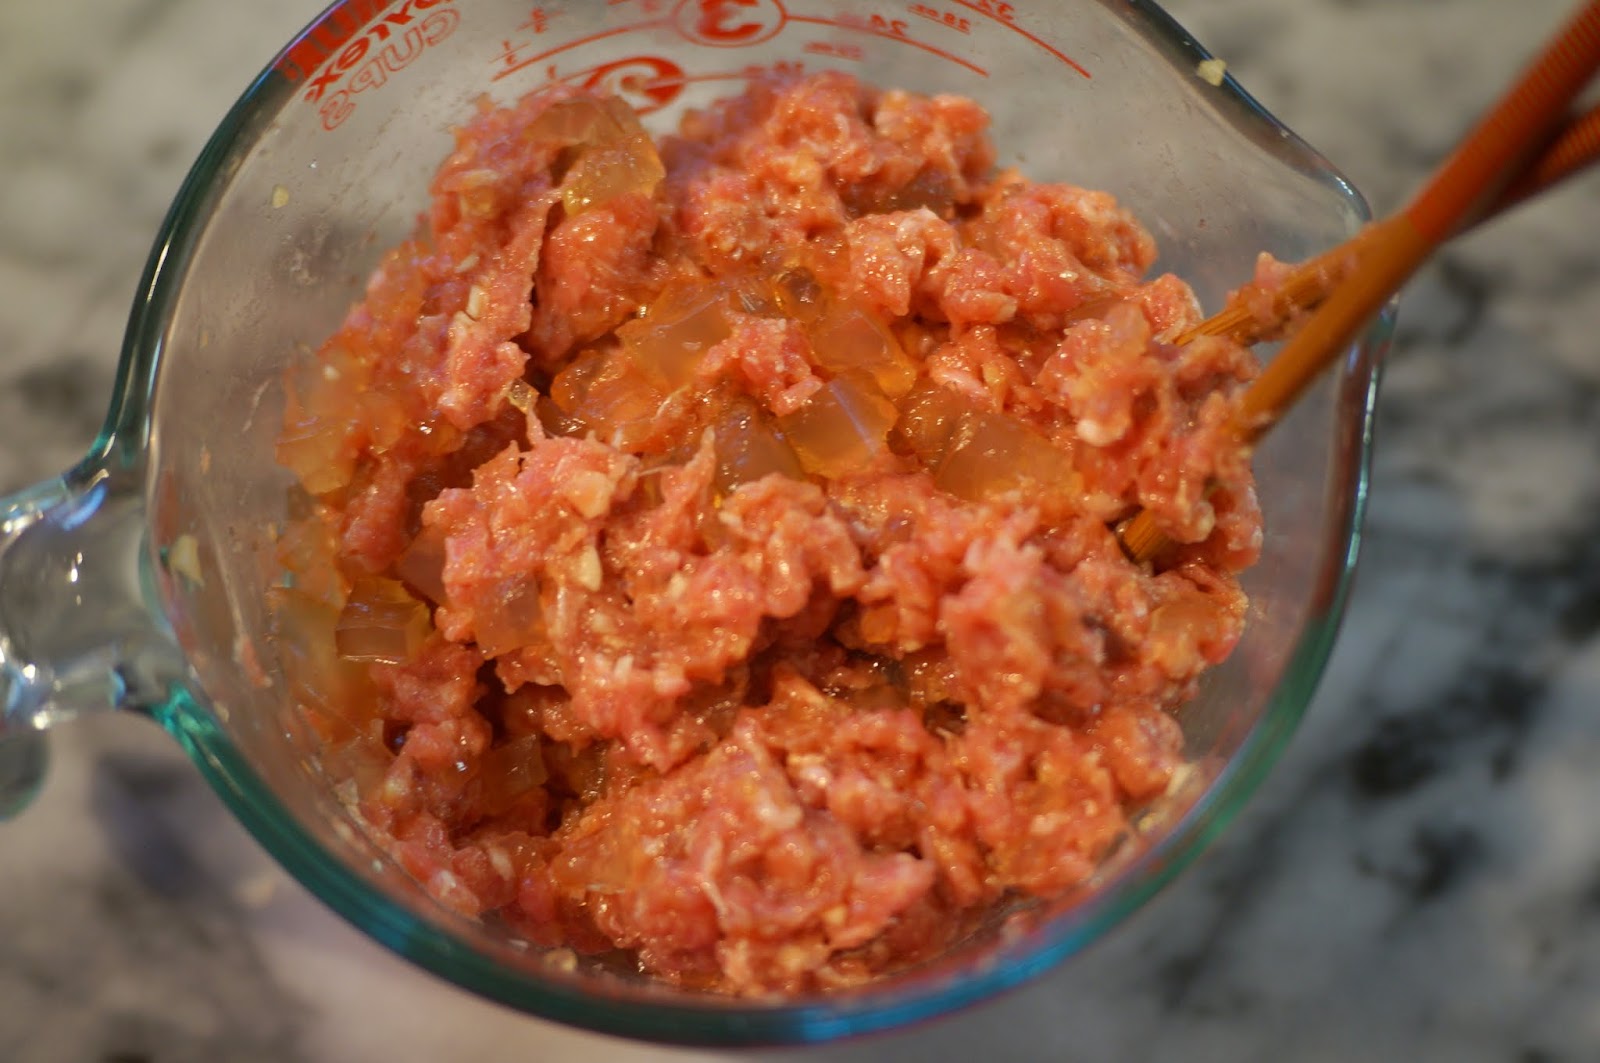
 Add the smaller pieces of aspic to the bowl of filling and use chopsticks to gently combine the ingredients. Set the filling aside.

 To make the dough, combine oil and hot water in a container. Get some flour into the mixing bowl and get it going before slowly drizzling in the liquids. Mix and knead until a smooth dough forms.

 Portion the dough into small pieces, between 0.7 to 0.9 ounces each.
 Roll out each piece of dough into a round, about 4" to 5" in diameter. Try to make the edges thinner and the center thicker.

 Get a dumpling making station set up with the filling, the larger pieces of cubed aspic, the dough rounds, and a little water.
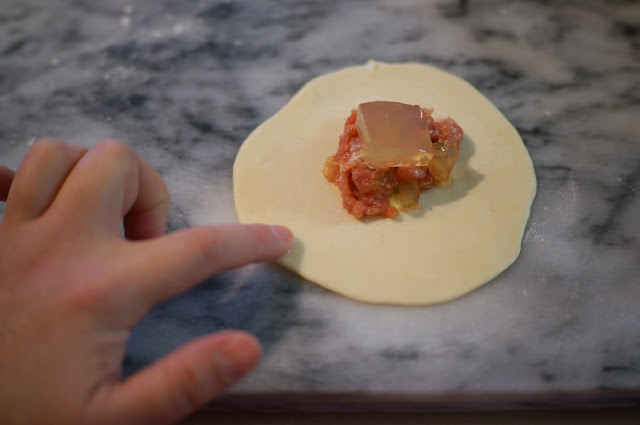
 Add about a tablespoon of filling to the center of the dough round and set a piece of aspic on top.

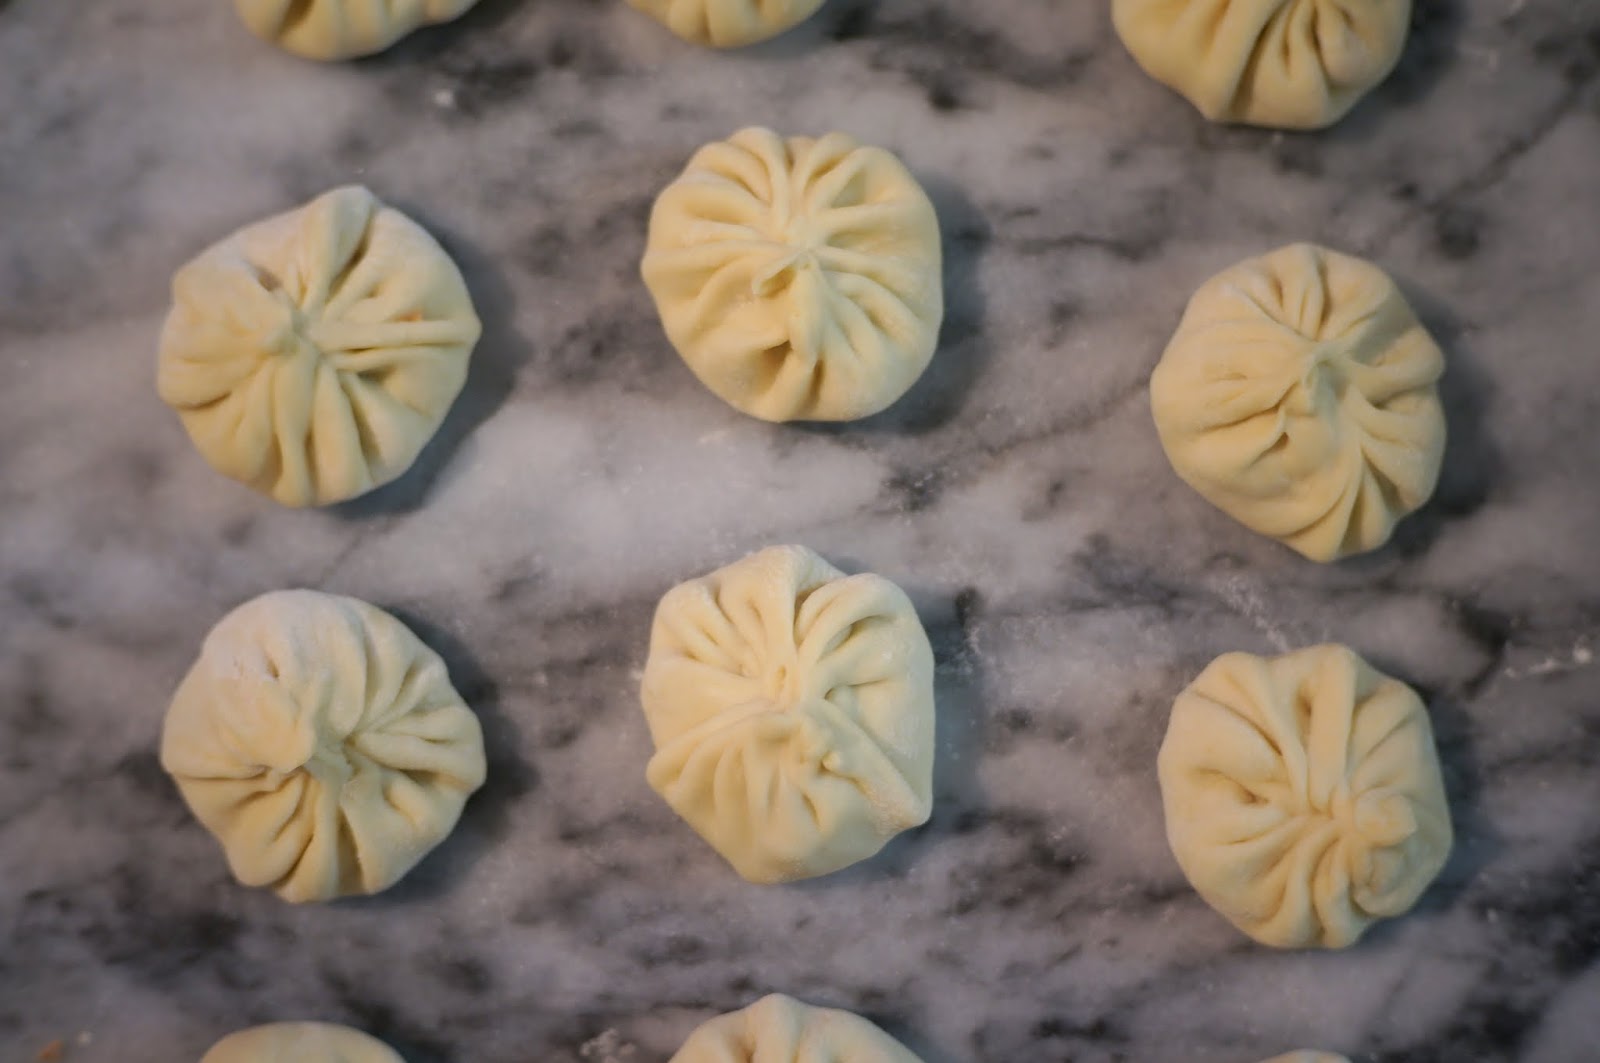
 Wet the edges of the dough sparingly with some water and then pinch it up to form the dumpling. Make sure the dumpling is completely sealed.


 I set half of the dumplings on a parchment-lined sheet pan and popped them in the freezer for future consumption.
 To make the dipping sauce, combine black vinegar, soy sauce, chopped scallions, and ginger matchsticks.


 To cook the dumplings, prepare a steamer basket over simmering water. If you're using a bamboo steamer, line the bottom with a parchment round (I just cut a circle out of parchment and dotted it with a hole-puncher) or cabbage leaves. Traditionally, a wok is used to steam Chinese food but I don't have a wok so I just used a shallow pot.
 Add the dumplings to the steamer basket, making sure to leave a little space between each. Cover the steamer and let the dumplings cook for 5 to 6 minutes or until the skin looks translucent and they're cooked through. When cooking frozen dumplings, they should be thawed for about 15 minutes at room temperature and then steamed for 8 to 10 minutes, or until cooked through.


 Serve the dumplings piping hot with the dipping sauce.

 These dumplings came out pretty fantastically, if I'm allowed to praise my own food. The best part is that I got to control the seasoning myself, so they weren't too salty or too bland. The soup is rich and decadent, the filling is hearty, and I love the chewy skin.

 By the way, I like to chomp a hole in the top of the dumpling, taking care not to spill any soup, and then I'll pour a little bit of the dipping sauce into the top. They're good without the sauce too but I like how the vinegar cuts through the richness of the broth. I'm not going to lie; I was pretty impressed with myself when I ate these. And I'm pretty glad I still have a few of the frozen ones left. They'll tide me over until my next dim sum outing.


 Here's the recipe page:

If you've never enjoyed xiao long bao, please, get yourself to a dim sum place as soon as possible and partake. They're just little Hershey kiss-shaped dumplings with a soupy filling. There's literally soup inside the dumpling and it's amazing. Whenever my friends and I go out for soup dumplings, we'd make an effort not to spill the soup. Whoever spills the soup is deemed the loser. You too can play this game; it's not copyrighted.
This is definitely a more time-consuming recipe and it's not something I really plan on doing again. I mean, maybe I would for a super special occasion, but it's a long process and honestly, I would rather pay someone else to make them, cook them, and serve them to me. However, I am glad I tried and they did turn out really delicious so if you're into labor intensive cooking projects, then you should make them all the time!

aspic
1 lb. pork tail
2 pork neck bones
¼ lb. Chinese ham
4 scallions, chopped
2 cloves garlic, crushed
2" piece ginger, chopped
1 teaspoon white peppercorns
4 cups water
filling
½ lb. ground pork
1 teaspoon grated ginger
2 cloves garlic, minced
2 teaspoons soy sauce
1 teaspoon honey
¼ teaspoon sesame oil
2 tablespoons Chinese rice wine
dough
2¼ cups flour
1 cup hot water
1 tablespoon vegetable oil
sauce
3 tablespoons black vinegar
1 tablespoon soy sauce
¼ teaspoon minced ginger
1 scallion, sliced
tools
bamboo steamer
parchment paper or cabbage leaves


Once the stock comes to a boil, skim off any scum that comes to the surface and then reduce the heat to low. Simmer the stock for about 2 hours, or until the broth has reduced by more than half and the meat is tender. The meat should be tender, not because it's going to be eaten, but because the tenderness is an indication that the collagen in the meat has broken down and released itself into the stock.


Comments
Post a Comment
I'd love to hear what you have to say!