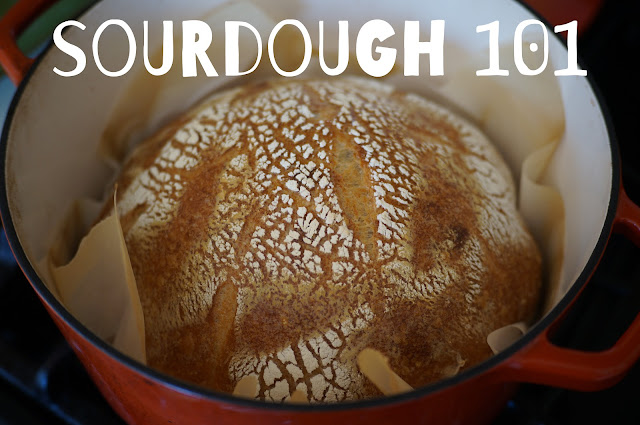
Sourdough 101
I feel compelled to preface this post by saying there are way more valuable, credible, accurate resources out there if you want to learn how to make really impressive sourdough. Today's conversation is not the vibe of an expert at all; I would be lying if I said I knew any more than someone who has never baked sourdough before. This is meant to act as more of a diary cataloging my personal journey of learning how to maintain a levain, navigating my first time baking sourdough all on my own, and sharing a few things I learned along the way.
If, like me, you're new to this experience but decided to hop on the sourdough bandwagon recently, just because that's what it seems like everyone is doing through this quarantine (despite the flour shortages in the grocery stores), hopefully this post can provide some camaraderie and comfort in the successes and failures that we have in common.
I think a lot of us have found common solace in sourdough during this quarantine. It's given us something to think about, something to research, to learn, to care about, to care for, and it's this tangible, edible, rewarding thing to have growth and progress and ups and downs in a time where we're trapped in our homes and drowning in uncertainty and boredom and new emotions we haven't faced before. Bread baking has meaning and gives structure because you have to keep the starter alive, you have to follow a schedule in caring for and shaping the dough, and it requires a commitment of time and effort but in the end, you feel nourished, both physically and mentally.
 Sourdough is a science and I think that is the allure for me (beyond my affinity for carbohydrates). Yeast exists everywhere and it settles onto wheat fields and makes its way into milled flour, it's in the air we breathe, it settles onto our kitchen countertops, and that's the reason why you can just mix two ingredients (flour and water), give it a little time, and end up with a bubbly, acidic concoction that's v. much alive and breathing. It's a traditional, rustic bread baking method that originated from back when people didn't understand - on a molecular level - yeast and bacteria and all that good stuff that made dough rise.
Ancient bakers just knew what to do and how to do it and that was enough; they made it work and I'm sure the bread was delicious. I think the issue many of us face now is that there's just too much information available at our fingertips and it often overcomplicates the simplest tasks into burdensome beasts that end up overwhelming us instead of bringing pleasure. And why? There's no benefit in being worried or bogged down when trying to make good food. In the case of sourdough, my goal was not perfection but just to enjoy the experience of trying.
 Before we get into the meat of the subject, let me throw you my top 3 takeaways from this experience:
 Baker's Percentages
The recipes I appreciated the most consisted of baker's percentages, which made it really easy to scale the quantities up and down.
How do you calculate dough hydration percentage? So, this one can get tricky, if you let it. Basically, it's the ratio of water to flour, so if you have 500 grams of water and 1000 grams of flour, that's a 50% hydration.
The reason I say it can get tricky is if you also pull in the hydration of the starter itself as well. Since starter is equal parts flour and water, it's at 100% hydration. So back to that previous example: let's say you're making a dough with 1000 grams of flour, 500 grams of water, and incorporating 100 grams of starter. Well, the starter is made of 50 grams each of flour and water, so then your total flour because 1050 grams, the water is 550 grams, and then the hydration becomes 52%. It seems like the common rule-of-thumb seems to be to ignore the starter when figuring the percentage since it barely influences the calculation (in most cases).
The wetter the dough, the better the crumb. The crumb of a dough refers to the size and irregularity of the micro and macro bubbles surrounded by dough that help constitute the structure of the bread. So, when you're looking at a slice of white bread, it should have a very tight crumb consisting of very tiny, even bubbles. The bread itself won't have much stretch to it; it'll just tear apart. In contrast, an artisan loaf of bread will have a v. open crumb, with irregular bubbles. There shouldn't be any obvious giant air pockets, but it isn't surprising to encounter a slightly larger bubble here and there and it will have a stretchy structure that presents a little bit of resistance to being pulled apart.
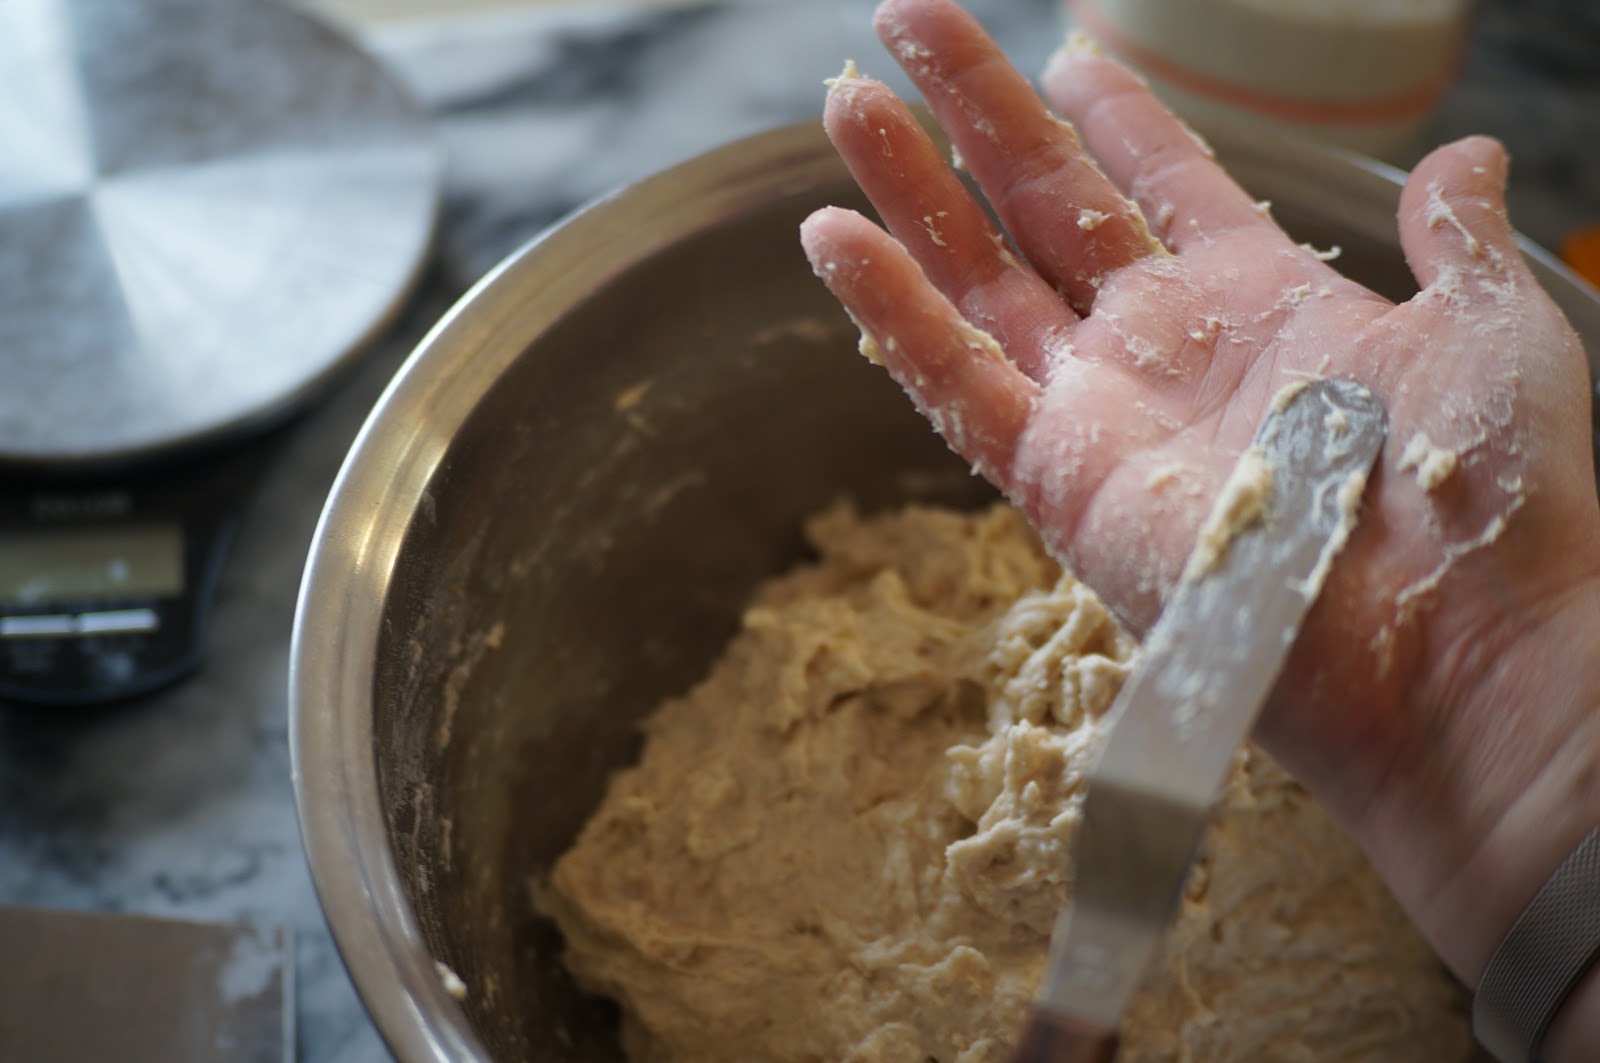
That being said, most artisan loaves have a pretty high hydration percentage, on the order of 80%. A dough that wet will be harder to work with and there's a high probability of ending up with dough-covered monster hands at some point in the process. It may seem counter-intuitive but water will be your friend. Wetting your hands before working with the dough, particularly during the 'stretch & fold' portion of bulk fermentation, will help keep your hands a little less messy. And because this process requires no aggressive kneading, there's no need (did I miss an opportunity for a pun here?) to involve both hands. Keep one hand clean and dry and a spatula or bench scraper handy to push the excess dough off your messy hand.


 Best Resources
There are so many great resources out there and you can certainly find someone with a personality you enjoy making the type of bread you prefer with just a quick google search. Personally, I found Tartine's recipe featured in the New York Times to be informative and easy to follow along and Bon Appetit featured Chad Robertson (of Tartine) casually whipping up three different sourdough loaves in a video (including the NYTimes-featured country loaf) and I found it so zen and casual and inspiring to watch.
I think the key is to pick a lane and stick to it. Read enough so you feel informed and comfortable but don't research so enthusiastically that you end up being confused by several differing opinions and start freaking out about how you only did a 3-hour bulk fermentation when that one bakery actually recommends only 2 hours but that other guy says 4 hours is ideal.
And keep your expectations reasonable. If you're completely new to baking, don't expect a miracle on your first try. That being said, pessimism isn't productive either. Just approach the process with an open mind and follow the directions as well as you can. Baking is essentially chemistry and there are loads of variables and so many things that can go wrong and so many things that can go right. You just have to be meticulous about the important things (like measuring) and a little less uptight about the things you cannot control (like the weather and subsequent temperature fluctuations).


 Final Thoughts
I haven't mastered sourdough by any means. At the point of writing this post, I've only made three loaves total. And even though they wouldn't be classified as perfect by most bakers, I still consider these first few attempts a success because I made something that was delicious and v. enjoyable.
There was certainly plenty of room for improvement but at the same time, the initial loaf was just so tasty and moreish, in the end, I feel like I did everything correctly and felt encouraged to try it again. And each time, the resultant loaf was yummy enough that I planned a meal around it - with the intention of making the bread the star component - and we were all "mm"-ing and smiling. Satisfying hunger is a goal I wholly achieved and it's the only one I cared about anyway.
Plus, because I was able to see a bit of improvement and progress between my initial loaf and loaf #2 and then further progress between loaf #2 and loaf #3, each made a week apart from the other, I understand that this is a process and I just have to succumb to the idea that experience is the best teacher.


 xoxo.
xoxo.
If, like me, you're new to this experience but decided to hop on the sourdough bandwagon recently, just because that's what it seems like everyone is doing through this quarantine (despite the flour shortages in the grocery stores), hopefully this post can provide some camaraderie and comfort in the successes and failures that we have in common.
I think a lot of us have found common solace in sourdough during this quarantine. It's given us something to think about, something to research, to learn, to care about, to care for, and it's this tangible, edible, rewarding thing to have growth and progress and ups and downs in a time where we're trapped in our homes and drowning in uncertainty and boredom and new emotions we haven't faced before. Bread baking has meaning and gives structure because you have to keep the starter alive, you have to follow a schedule in caring for and shaping the dough, and it requires a commitment of time and effort but in the end, you feel nourished, both physically and mentally.

Ancient bakers just knew what to do and how to do it and that was enough; they made it work and I'm sure the bread was delicious. I think the issue many of us face now is that there's just too much information available at our fingertips and it often overcomplicates the simplest tasks into burdensome beasts that end up overwhelming us instead of bringing pleasure. And why? There's no benefit in being worried or bogged down when trying to make good food. In the case of sourdough, my goal was not perfection but just to enjoy the experience of trying.

- Keep a journal and write everything down, including the weight of your container (remember empty-vessel-weighing from chemistry class?). This is a great way to keep track of feedings and quantities and schedule.
Be sure to take notes on aroma and texture and anything other observations that may seem insignificant but may be helpful for troubleshooting if you run into any issues. And jot down any and all tips and tricks from articles you're reading or videos you're watching, given by the experts. It'll be much easier to refer back to notes in a journal than it is to dig through your internet history to try and find that one spot where that guy said that thing about that other thing.
(And don't invest in some fancy new Moleskine and put extra pressure on yourself; just grab any old half-used notepad and keep it casual.) - Use a rubber band to mark the level of the starter to gauge its growth. Instead of using marker or tape, I prefer a rubber band because it's so much more mobile and easy to change. Marker can leave behind some extra smudgy marks and I think that can be confusing. And tape can lose stickiness and it's just wasteful to keep ripping a new piece every time you feed your starter.
- Use a kitchen scale but don't burden yourself with being super precise. Working with weight is much more valuable than working with volume, at least when it comes to flour, because we all measure dry ingredients a little differently and there are so many other factors that can affect the measurements, including humidity, temperature, and even the amount of time your flour has had to settle in its container. That being said, I like to work in grams; it's much more forgiving and going over or under by a couple grams here and there will not make or break your starter.
Procuring and/or Making Leaven
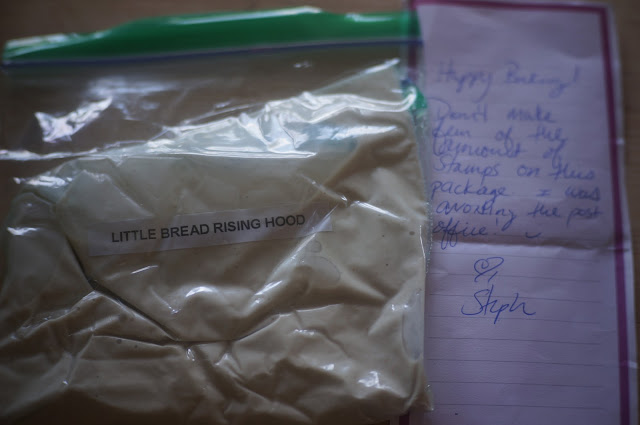
I was lucky enough to get some starter from my coworker. She sent some via post, double-bagged in zip top baggies, in an envelope with ten stamps. The accompanying note explained that she was avoiding the post office. All the sourdough enthusiasts recommend naming your starter (supposedly this encourages you to take better care of it?) but mine came pre-named: Little Bread Rising Hood.
 Even though starter, also referred to as leaven or levain (if you're fancy and French), is just equal parts flour and water, because the type of yeast and bacteria that exists from place to place will differ, they can all taste wildly different. So even if you inherit a starter from someone else, chances are, within a week or two, it'll be transformed into something new.
You can either experiment with different flours and make a starter from scratch or if you're looking for a shortcut you can get some from a friend or if you have a specific flavor and quality in mind just ask a bakery you like if they wouldn't mind sharing.
 Storage
Because leaven creates lactic acid (that's what gives sourdough bread its namesake acidic flavor), it's best kept in a non-reactive jar, like glass. Plastic is okay as a temporary vessel, but if you plan on making bread making a long-term hobby (some people have been maintaining their starter for years), it's best to stick with glass. A clear container also allows you to easily observe the growth of the leaven.
Use a container with a wide enough mouth to make mixing easy. And make sure the container has a lid. You don't want to close off the container so it's air tight because this living, breathing thing is releasing loads of gas. However, you don't want to expose it to unnecessary oxygen. Something that covers the opening of the container without completely sealing it shut; a loosely lidded mason jar works well (and if you have the gasket lids, flip it so the rubbery side isn't sealing off the lid completely).
Keeping the starter in the fridge is your best bet for longer term maintenance, unless you are someone that enjoys that daily feeding ritual, plan on baking bread daily, and/or if you don't mind a lot of discard.
 Feeding
The starter needs to be fed, at a minimum, its own weight worth of "food" at every feeding. So, if your starter is made of 4 ounces each of flour and water, it needs to be fed 4 ounces each of flour and water. If you plan on keeping your starter at room temperature, it should be fed daily. If you plan on keeping your starter in the fridge, it can be fed as often as twice a week or if you want to be a little more low-maintenance and casual, you can stretch out feedings to once biweekly; just keep an eye on its growth.
 Discard
What's with the discard? So, every time you feed your starter, you'll want to get rid of a bunch of it before you actually give it any food. I was a little bamboozled by this one at first. It just seemed like an exercise in waste. But because feeding starter requires one to give it enough "food" to equal its current weight (as I explained above), this means the leaven would continue to double again and again and again until the size of the starter became unmanageable. Well, that is, unless you're running a bakery and baking enough to use up the starter as quickly as it's being made.
But something I learned from my research was that you don't need to necessarily maintain a large starter. I became accustomed to limiting my starter size to around 100 grams (or a little less than 4 oz.) by feeding it just 50 grams (a little less than 2 oz.) each of flour and water at every feeding, whereas most guides will recommend twice that amount. I found this smaller amount of starter to be much more manageable and less wasteful. And it's the perfect amount for me to make my one standard loaf every weekend.
That's not to say I was throwing away the discard initially though. I was saving it in a separate container to be used for other recipes; there are a lot of ideas for how to use discard out there on the internet. My first attempt at using the discard was for Korean chive pancakes; unfortunately they were a bit too acidic and tasted a little too yeasty, like biting into a chewable form of beer, but since that experiment, I've learned that throwing in a little baking soda can temper that acidity and funk to a more palatable level.
I was lucky enough to get some starter from my coworker. She sent some via post, double-bagged in zip top baggies, in an envelope with ten stamps. The accompanying note explained that she was avoiding the post office. All the sourdough enthusiasts recommend naming your starter (supposedly this encourages you to take better care of it?) but mine came pre-named: Little Bread Rising Hood.

You can either experiment with different flours and make a starter from scratch or if you're looking for a shortcut you can get some from a friend or if you have a specific flavor and quality in mind just ask a bakery you like if they wouldn't mind sharing.
Because leaven creates lactic acid (that's what gives sourdough bread its namesake acidic flavor), it's best kept in a non-reactive jar, like glass. Plastic is okay as a temporary vessel, but if you plan on making bread making a long-term hobby (some people have been maintaining their starter for years), it's best to stick with glass. A clear container also allows you to easily observe the growth of the leaven.
Use a container with a wide enough mouth to make mixing easy. And make sure the container has a lid. You don't want to close off the container so it's air tight because this living, breathing thing is releasing loads of gas. However, you don't want to expose it to unnecessary oxygen. Something that covers the opening of the container without completely sealing it shut; a loosely lidded mason jar works well (and if you have the gasket lids, flip it so the rubbery side isn't sealing off the lid completely).
Keeping the starter in the fridge is your best bet for longer term maintenance, unless you are someone that enjoys that daily feeding ritual, plan on baking bread daily, and/or if you don't mind a lot of discard.
The starter needs to be fed, at a minimum, its own weight worth of "food" at every feeding. So, if your starter is made of 4 ounces each of flour and water, it needs to be fed 4 ounces each of flour and water. If you plan on keeping your starter at room temperature, it should be fed daily. If you plan on keeping your starter in the fridge, it can be fed as often as twice a week or if you want to be a little more low-maintenance and casual, you can stretch out feedings to once biweekly; just keep an eye on its growth.

What's with the discard? So, every time you feed your starter, you'll want to get rid of a bunch of it before you actually give it any food. I was a little bamboozled by this one at first. It just seemed like an exercise in waste. But because feeding starter requires one to give it enough "food" to equal its current weight (as I explained above), this means the leaven would continue to double again and again and again until the size of the starter became unmanageable. Well, that is, unless you're running a bakery and baking enough to use up the starter as quickly as it's being made.
But something I learned from my research was that you don't need to necessarily maintain a large starter. I became accustomed to limiting my starter size to around 100 grams (or a little less than 4 oz.) by feeding it just 50 grams (a little less than 2 oz.) each of flour and water at every feeding, whereas most guides will recommend twice that amount. I found this smaller amount of starter to be much more manageable and less wasteful. And it's the perfect amount for me to make my one standard loaf every weekend.
That's not to say I was throwing away the discard initially though. I was saving it in a separate container to be used for other recipes; there are a lot of ideas for how to use discard out there on the internet. My first attempt at using the discard was for Korean chive pancakes; unfortunately they were a bit too acidic and tasted a little too yeasty, like biting into a chewable form of beer, but since that experiment, I've learned that throwing in a little baking soda can temper that acidity and funk to a more palatable level.

The recipes I appreciated the most consisted of baker's percentages, which made it really easy to scale the quantities up and down.
How do you calculate dough hydration percentage? So, this one can get tricky, if you let it. Basically, it's the ratio of water to flour, so if you have 500 grams of water and 1000 grams of flour, that's a 50% hydration.
The reason I say it can get tricky is if you also pull in the hydration of the starter itself as well. Since starter is equal parts flour and water, it's at 100% hydration. So back to that previous example: let's say you're making a dough with 1000 grams of flour, 500 grams of water, and incorporating 100 grams of starter. Well, the starter is made of 50 grams each of flour and water, so then your total flour because 1050 grams, the water is 550 grams, and then the hydration becomes 52%. It seems like the common rule-of-thumb seems to be to ignore the starter when figuring the percentage since it barely influences the calculation (in most cases).
The wetter the dough, the better the crumb. The crumb of a dough refers to the size and irregularity of the micro and macro bubbles surrounded by dough that help constitute the structure of the bread. So, when you're looking at a slice of white bread, it should have a very tight crumb consisting of very tiny, even bubbles. The bread itself won't have much stretch to it; it'll just tear apart. In contrast, an artisan loaf of bread will have a v. open crumb, with irregular bubbles. There shouldn't be any obvious giant air pockets, but it isn't surprising to encounter a slightly larger bubble here and there and it will have a stretchy structure that presents a little bit of resistance to being pulled apart.
That being said, most artisan loaves have a pretty high hydration percentage, on the order of 80%. A dough that wet will be harder to work with and there's a high probability of ending up with dough-covered monster hands at some point in the process. It may seem counter-intuitive but water will be your friend. Wetting your hands before working with the dough, particularly during the 'stretch & fold' portion of bulk fermentation, will help keep your hands a little less messy. And because this process requires no aggressive kneading, there's no need (did I miss an opportunity for a pun here?) to involve both hands. Keep one hand clean and dry and a spatula or bench scraper handy to push the excess dough off your messy hand.


There are so many great resources out there and you can certainly find someone with a personality you enjoy making the type of bread you prefer with just a quick google search. Personally, I found Tartine's recipe featured in the New York Times to be informative and easy to follow along and Bon Appetit featured Chad Robertson (of Tartine) casually whipping up three different sourdough loaves in a video (including the NYTimes-featured country loaf) and I found it so zen and casual and inspiring to watch.
I think the key is to pick a lane and stick to it. Read enough so you feel informed and comfortable but don't research so enthusiastically that you end up being confused by several differing opinions and start freaking out about how you only did a 3-hour bulk fermentation when that one bakery actually recommends only 2 hours but that other guy says 4 hours is ideal.
And keep your expectations reasonable. If you're completely new to baking, don't expect a miracle on your first try. That being said, pessimism isn't productive either. Just approach the process with an open mind and follow the directions as well as you can. Baking is essentially chemistry and there are loads of variables and so many things that can go wrong and so many things that can go right. You just have to be meticulous about the important things (like measuring) and a little less uptight about the things you cannot control (like the weather and subsequent temperature fluctuations).


Recipe
As I alluded to above, I chose to stick to Chad Robertson's rulebook and used the Tartine recipe as a guide. I was wary of messing up and wasting flour (a precious resource in these COVID-affected times) and chose to make a half batch to start. I actually appreciated my decisions as I got into this process as it was a much more workable quantity of dough for my small hands and I also didn't have to stress out about scheduling the baking of two loaves with only one dutch oven during my first time attempting all of this.
Here are the quantities I used:
400 grams all purpose flour (80%)
100 grams whole wheat flour (20%)
375 grams water (75% hydration)
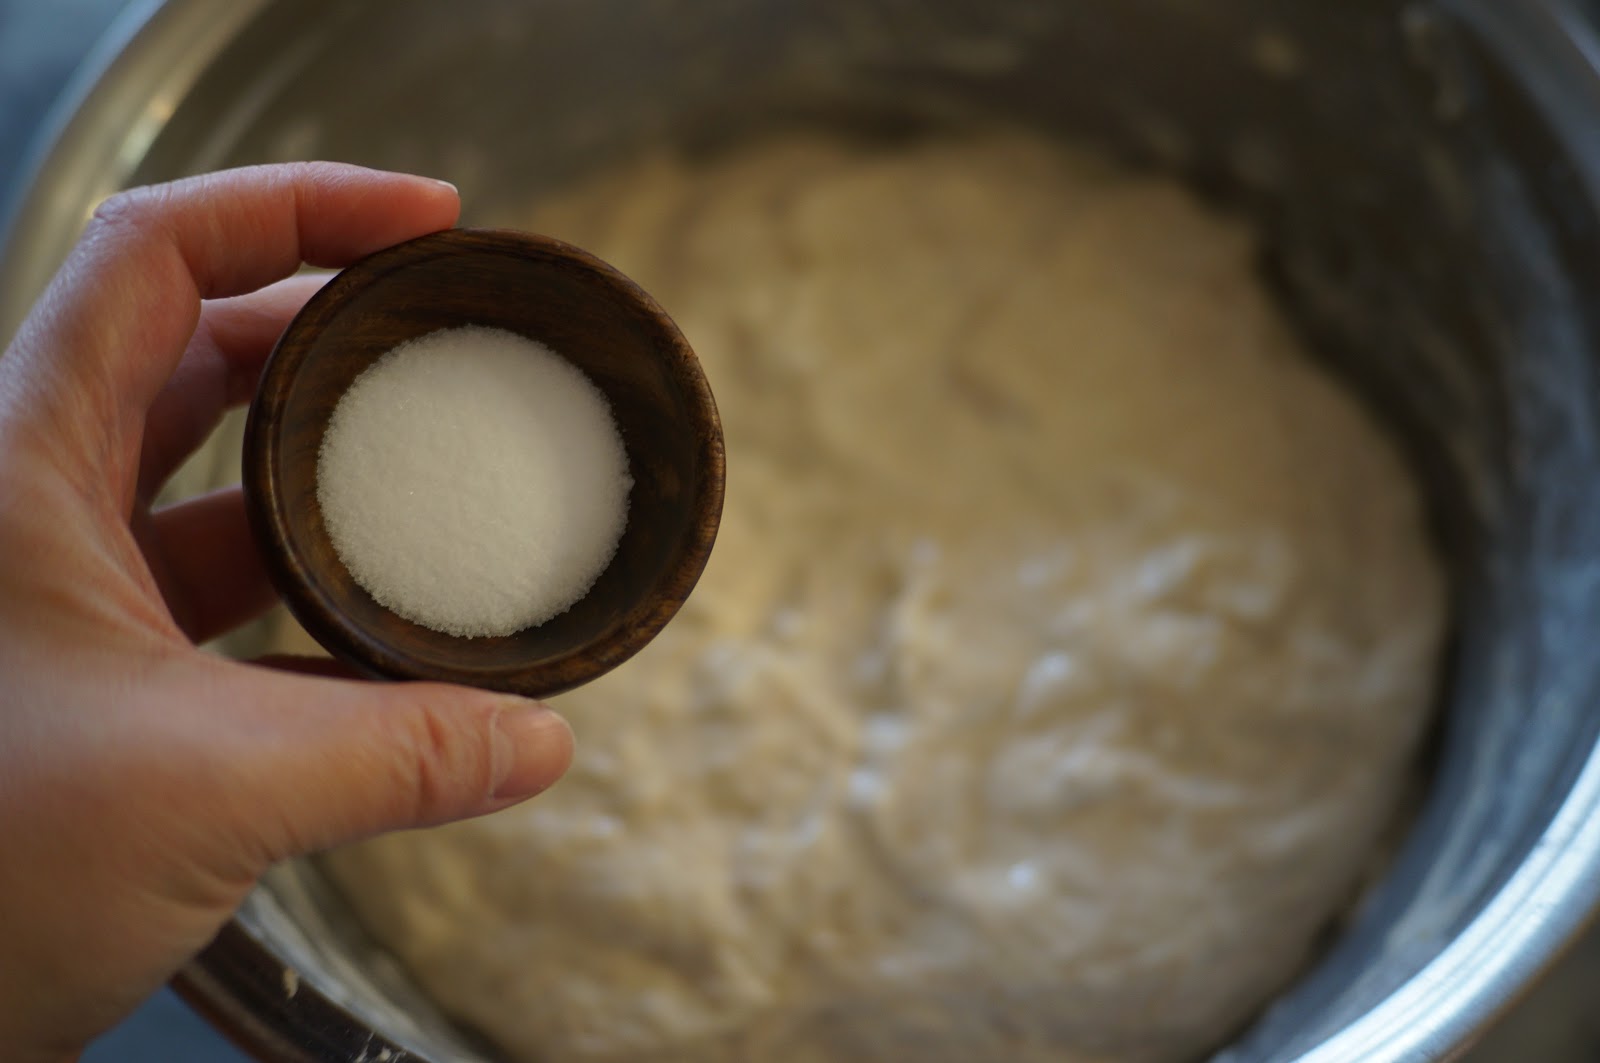
10 grams salt (2%)
25 grams additional water added with salt (brings the hydration up to 80%)


I haven't mastered sourdough by any means. At the point of writing this post, I've only made three loaves total. And even though they wouldn't be classified as perfect by most bakers, I still consider these first few attempts a success because I made something that was delicious and v. enjoyable.
There was certainly plenty of room for improvement but at the same time, the initial loaf was just so tasty and moreish, in the end, I feel like I did everything correctly and felt encouraged to try it again. And each time, the resultant loaf was yummy enough that I planned a meal around it - with the intention of making the bread the star component - and we were all "mm"-ing and smiling. Satisfying hunger is a goal I wholly achieved and it's the only one I cared about anyway.
Plus, because I was able to see a bit of improvement and progress between my initial loaf and loaf #2 and then further progress between loaf #2 and loaf #3, each made a week apart from the other, I understand that this is a process and I just have to succumb to the idea that experience is the best teacher.


Comments
Post a Comment
I'd love to hear what you have to say!