Ichiban Ramen
This recipe is dedicated to my friend G. She was one of my roommates and best friends in college and she actually introduced me to Sapporo Ichiban ramen.
After my successful attempt to make udon noodles, I was motivated to try my hand at making homemade ramen noodles. I didn't want to get super complicated with the broth and roasting pork for shoyu ramen or even going to so far as to poach an egg. I just wanted a really simple, basic ramen dish and that's when it hit me: I should try and make a more "gourmet" version of Ichiban ramen. The broth base of this brand of ramen is meaty and savory with a real depth of flavor. I didn't 100% replicate the actual taste of the little powder packet of broth but I think I did a pretty good job making a really rich soup to accompany the chewy noodles.
 Ingredients [serves 4]:
noodles
2½ teaspoons baking soda
2 cups flour
½ cup water
broth
1 teaspoon sesame oil
2 teaspoons canola oil
½ onion, roughly chopped
2 cloves garlic, smashed
small handful dried anchovies
1 lb. chicken wings
1 teaspoon salt
12 cups water
1 tablespoon soy sauce
1 tablespoon miso paste
 I'm going to explain the process of making the noodles and then explain how to make the broth but how this realistically happened was I went back and forth between the two because there's downtime in the steps of making both. So, you'll start by baking the baking soda, then while that's in the oven, you can start on the broth, while the broth is coming up to a boil you can make the dough for the noodles, while the dough is resting, you can finish the broth, and then you can boil the noodles and strain the broth and assemble the ramen.
So, the first step is to force a chemical reaction in the baking soda. Baking soda is sodium bicarbonate (which is why in the UK they call it bicarbonate of soda) and when you apply heat, it becomes sodium carbonate and it increases the pH (which is a number indicating the acidity or alkalinity or neutrality of a chemical). Increasing the pH will help yield a chewier noodle. Also, it'll bring a yellower hue to the noodle, which is great for the aesthetics of the dish.
Sprinkle baking soda onto a sheet pan (use parchment or foil for easy handling after the fact) and pop into a 250F oven for one hour. Be careful with the baked baking soda as it is v. irritating to your skin.
 Pour the baked baking soda into water and stir. It won't completely dissolve but if you did a comparison with the same quantity of regular unbaked baking soda, you'd find that a higher quantity of baked baking soda will dissolve as compared to the regular.
 Drizzle the alkaline water over the flour and toss gently with a fork to more evenly distribute the water.
 Stir until the fork is rendered useless and then use your hands to press the dough into a ball.

 Put the barely-together dough into a zip-top bag and knead either by stepping on it or by banging on it with a rolling pin. The goal is to press it into a rectangle, fold the rectangle into thirds, rotate the dough 90 degrees inside the bag, and then step/beat again. Continue this kneading process until the dough is smooth and elastic.


 Let the dough rest for one hour, at least. During this time, the gluten will calm down a lot. You'll know the dough is ready to be rolled out when you poke it and your finger leaves an indent. If the gluten is still agitated, the dough will be too bouncy and your poke won't even hold at all or it will slowly relieve itself.

 Use a pasta machine to roll out the dough to a medium thickness. I went to level '6' on my Atlas Marcato. Leave the sheets to dry out a bit.

 Use the cutter to cut the dough sheets into thin, springy noodles.
 Let the noodles dry out for a little bit; about ten minutes will do it.
 Bring a large pot of water to a boil and cook the noodles for two minutes.

 Drain and rinse under ice cold water. This shocks the noodles and helps them have a chewier texture.
 Now let's move onto the broth.
 Add sesame oil and canola oil to a stockpot over medium heat. Add onion, garlic, and dried anchovy and saute until the onions start to take on a little color. I even like to take it so far as to allow some of the smaller onion bits to char. The charred onion bits bring incredible richness, a subtle sweetness, and depth to the broth.

 Add chicken wings to the pot and cook long enough to allow the skins to get a little bit golden. I put mine into the pot in a mass (they were in a vacuum sealed package) and they sort of sealed together during the browning (but eventually broke apart in the broth).
 Add water and raise the heat to bring the stock to a boil. This is when bits of scum will appear at the surface; skim off any of the bubbles and scum as best you can.


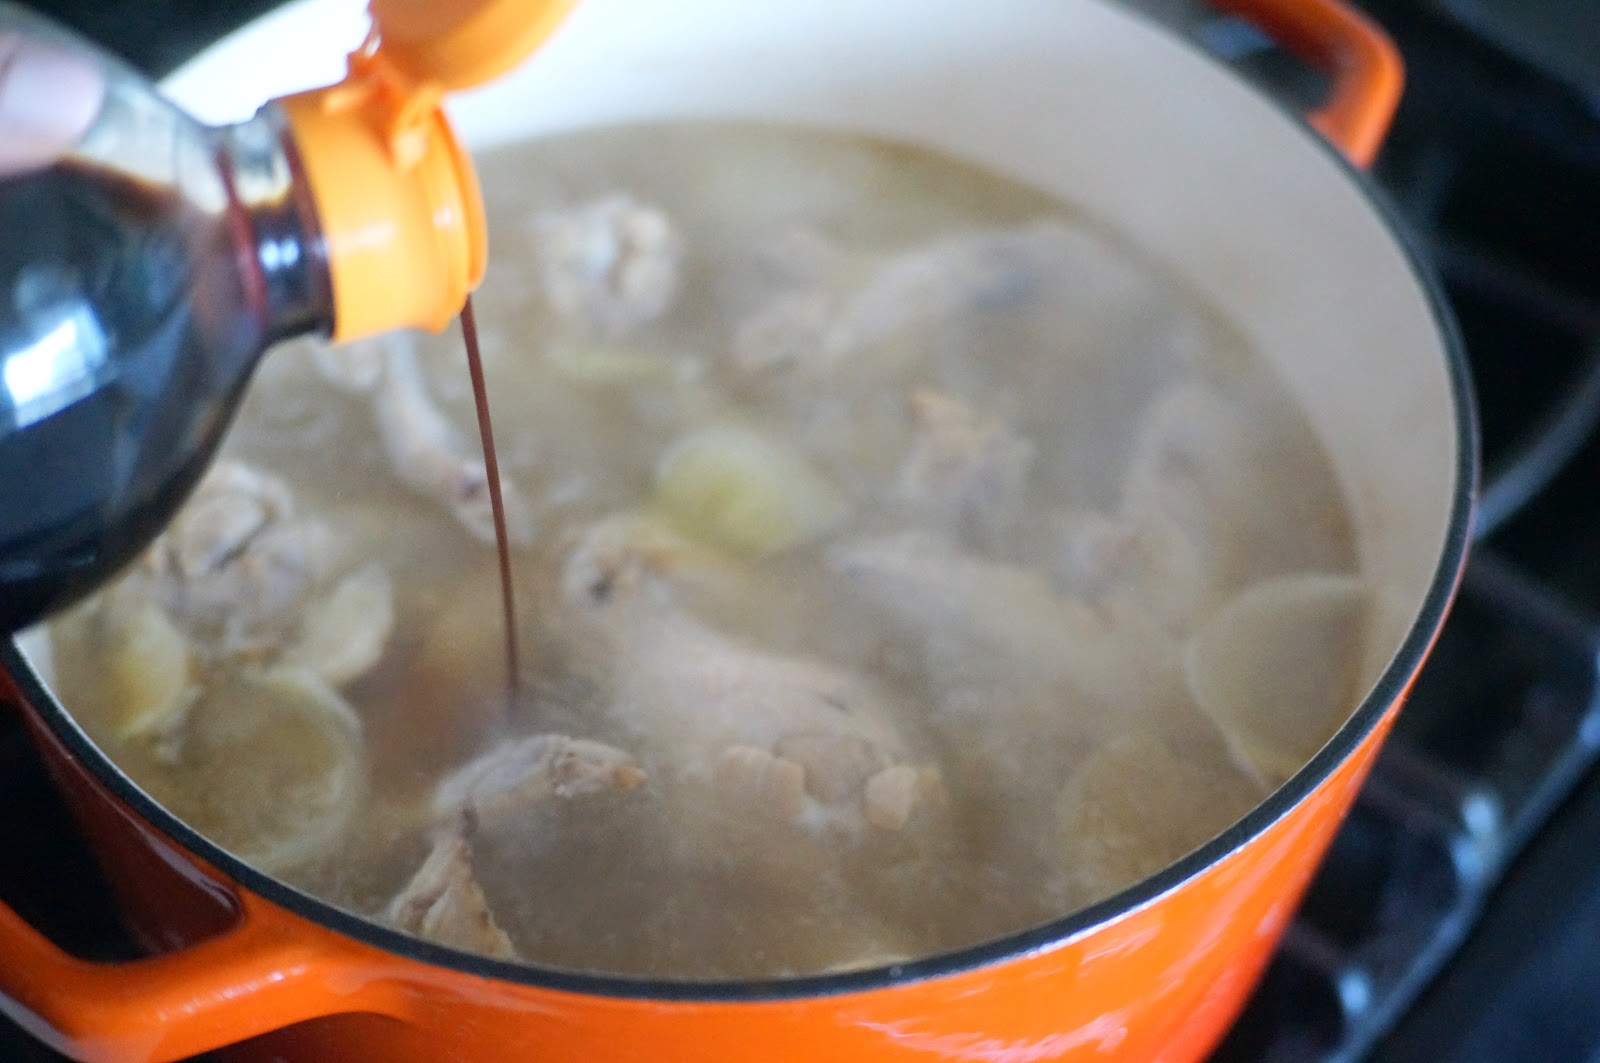
 Add soy sauce and miso to the boiling soup. Reduce heat to a simmer and cook until the stock is reduced by about a third. So you're starting with twelve cups of water and you want to end up with about eight.

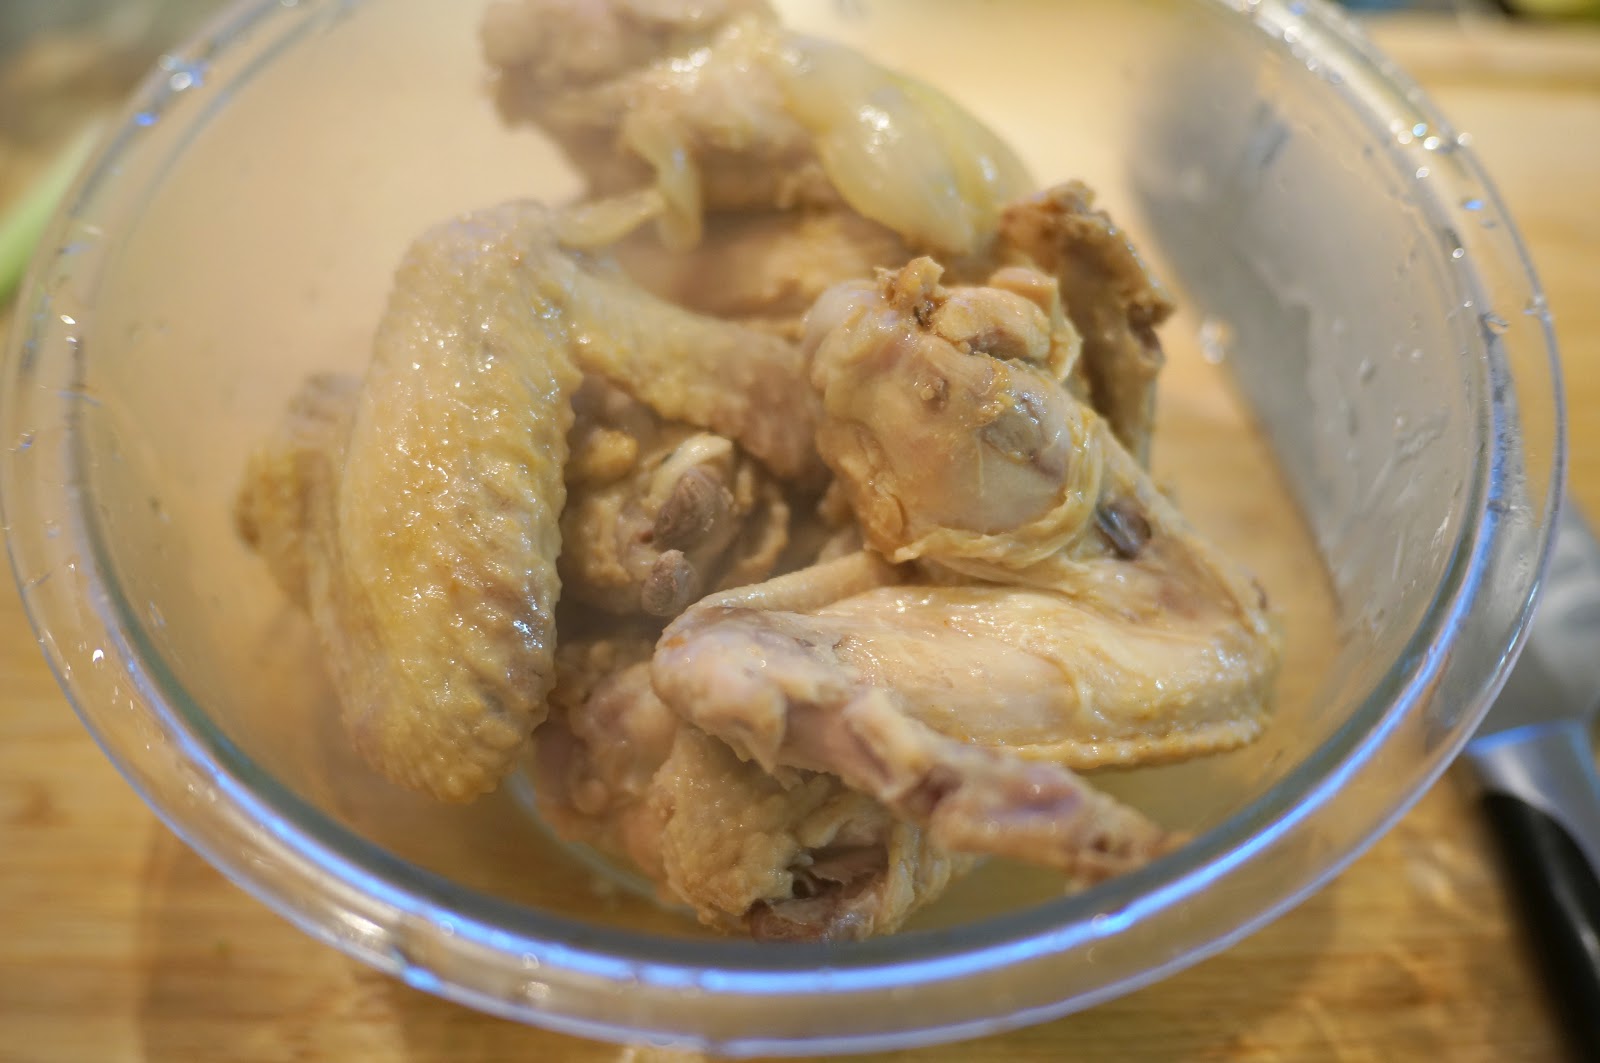
 Once the stock is reduced, fish out the chicken wings and strain to get rid of the onion bits, garlic, and anchovy.


 Portion the noodles into bowls and pour a few ladles of stock over top. Garnish with a little sliced scallions and serve immediately.

 We had our meal with some pickled radish, katsu curry, and seaweed & cucumber side dish.
 The ramen was pretty delicious. Like I said in my intro, it wasn't a spot on dupe for the real thing, but it was really delicious. The broth was so rich and had such depth of flavor and loads of umami punch. And in fact, we had some broth and noodles leftover so I refrigerated them separately for future consumption and the broth completely solidified into a gelatinous mass; that's how much goodness the chicken wings gave up.
I think this could easily be done with a beef base as well (with a brisket or just stew meat) but I really liked how the chicken version came out. As deep as the flavor was, it still had that light, comforting chickeny flavor. And I can't forget to comment on the noodles. They were springy and chewy and though I admittedly missed the not-so-subtle oily flavor of the packaged stuff, this was a great gourmet substitute.


 Here's the recipe page:

After my successful attempt to make udon noodles, I was motivated to try my hand at making homemade ramen noodles. I didn't want to get super complicated with the broth and roasting pork for shoyu ramen or even going to so far as to poach an egg. I just wanted a really simple, basic ramen dish and that's when it hit me: I should try and make a more "gourmet" version of Ichiban ramen. The broth base of this brand of ramen is meaty and savory with a real depth of flavor. I didn't 100% replicate the actual taste of the little powder packet of broth but I think I did a pretty good job making a really rich soup to accompany the chewy noodles.

noodles
2½ teaspoons baking soda
2 cups flour
½ cup water
broth
1 teaspoon sesame oil
2 teaspoons canola oil
½ onion, roughly chopped
2 cloves garlic, smashed
small handful dried anchovies
1 lb. chicken wings
1 teaspoon salt
12 cups water
1 tablespoon soy sauce
1 tablespoon miso paste

So, the first step is to force a chemical reaction in the baking soda. Baking soda is sodium bicarbonate (which is why in the UK they call it bicarbonate of soda) and when you apply heat, it becomes sodium carbonate and it increases the pH (which is a number indicating the acidity or alkalinity or neutrality of a chemical). Increasing the pH will help yield a chewier noodle. Also, it'll bring a yellower hue to the noodle, which is great for the aesthetics of the dish.
Sprinkle baking soda onto a sheet pan (use parchment or foil for easy handling after the fact) and pop into a 250F oven for one hour. Be careful with the baked baking soda as it is v. irritating to your skin.


I think this could easily be done with a beef base as well (with a brisket or just stew meat) but I really liked how the chicken version came out. As deep as the flavor was, it still had that light, comforting chickeny flavor. And I can't forget to comment on the noodles. They were springy and chewy and though I admittedly missed the not-so-subtle oily flavor of the packaged stuff, this was a great gourmet substitute.


Comments
Post a Comment
I'd love to hear what you have to say!